Free Fillings or Deep Cleaning! Hailing all Boston-area residents!

For all graduating 4th year dental school students, February is a CRAZY month as this is the month we are searching in every nook and cranny for patients for our dental LICENSURE EXAM!!! 


What it means for you? If you have the cavities or gum condition that qualify for the exam, not only do you get the filling / cleaning for FREE, you also get $100 in compensation! It is an INCREDIBLE deal. 

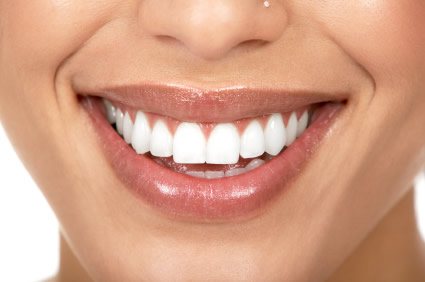
nice-teeth

Details, Details…

Our screening is really simple, easy and painless. I would bring you in to the Tufts dental clinic on 1 Kneeland St, Boston, MA 02111 and we’ll take a few x-rays to see if you have cavities that qualify for the free fillings / cleaning. This is all free of charge to you and takes ~15 minutes.
If you DO have qualifying cavities, I’ll need to borrow you for a few hours on March 8 or 9th, 2014 (one of those days, but probably sunday the 9th) for the actual exam. Exam location is still: Tufts University School of Dental Medicine at 1 Kneeland St, Boston MA 02111 (same as the screening).
The filling will not only be FREE ($0), but I will personally compensate you for your time as well. Plus, if you enjoy your time with me we can get you in for a free exam and cleaning afterwards too! So LOTS to look forward to. 🙂 
Unfortunately you won’t be able to qualify if: You are diabetic and on medications
Tufts Dental School is one of the top dental schools in the nation. You’ll be in good hands!
Please e-mail: lucky taste buds AT gmail.com if you are SERIOUSLY interested.

Ezekiel 4:9 Flax Bread: Reviewed

I can never turn down a good bread basket at a nice restaurant, in fact, I’ve been known to pick date night places based on the looks of their bread baskets. However, restaurant bread obsession aside, my biggest issue with regular ol’ whole grain bread is that it never fills me up. And…I can end up eating 4 slices (think: French toast) and still be hungry! Never mind that it’s whole grain.

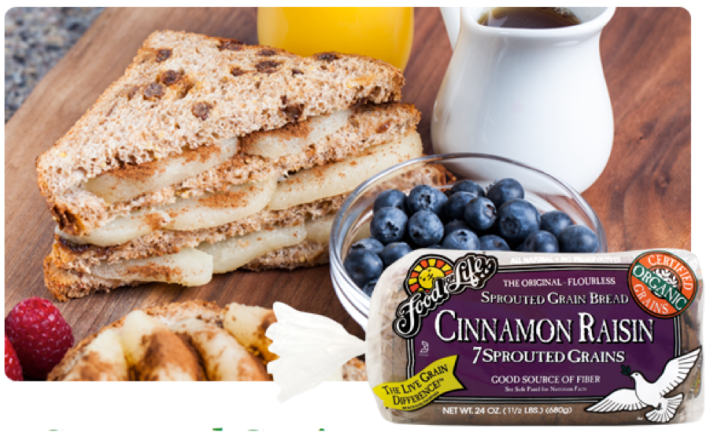
I first discovered Ezekiel bread at Trader Joe’s back in college. FLOUR-FREE bread was a concept that was…rather intriguing. Honestly, I was curious about the hype and was doubtful the taste and texture of a bread made with no flour would be any good. My first loaf bought was cinnamon raisin. After that day, Ezekiel became a staple.

 Image

A little background on Ezekiel bread made by Food For Life. If it’s not made from flour…what is it made from then?

  • Made from freshly sprouted certified organic live grains.
  • Kosher.
  • Use absolutely NO flour. Studies have shown that grinding grains into flour increases the surface area upon which enzymes in the body can work to more, quickly convert starch into glucose.
  • No genetically modified organisms (GMO’s)
  • No refined sugars. When sugar is refined and processed there are many harmful ingredients that are added to the sugar as a result. Instead, they use malted barley, a natural sweetener produced from sprouted barley, which is basically a carbohydrate comprised mostly of complex carbohydrates rather than the “sugar” carbohydrates.
  • Nothing artificial – no preservatives or shortenings.
  • Use a unique slow-bake process to preserve the natural fiber and bran benefits of grains.

For more information about the company, feel free to visit their website.

When Danielle contacted me to try the newest flax sprouted bread from Food for Life, I jumped at the chance to try it out! When the 2 loaves came, I froze them right away (bread doesn’t do well on our counter tops too well!).

 Image

Ingredients

Organic Sprouted Wheat, Filtered Water, Organic Sprouted Flax, Organic Sprouted Barley, Organic Sprouted Millet, Organic Malted Barley, Organic Sprouted Lentils, Organic Sprouted Soybeans, Organic Sprouted Spelt, Fresh Yeast, Organic Wheat Gluten, Sea Salt. Rolled in Organic Flax Seeds.


Check out the awesome nutritional profile.


Image 

Taste and Texture: Mind you, I’m a lover of all things grainy, coarse, crunchy, sometimes even a little dry. When toasted up, Ezekiel bread is definitely a…”dry bread”. Keep it at room temperature and it’ll be softer, more like your regular bread. The flavor is very much a mild, wheaty flavor. No sweetness but lots of seedy goodness from the sesame, flax, and barley.

However, I LOVE the grains incorporated into these breads. Every bite feels substantial and the seeds really do add to the flavor and texture to the sandwich. This is the perfect sandwich bread with smoked salmon, deli turkey or chipotle hummus in between.

Price: Trader Joes here in Boston sells the bread for $3.69 a loaf. The regular grocery store sell it for at least $1 more. I do know the TJ’s offers a TJ brand of Ezekiel made with sprouted grains, which is a little more forgiving on the wallet, but have not personally tried it yet.

Bottom Line:I only have Ezekiel bread in my apartment as it is the most filling, healthy kind of bread that I find delicious. High in fiber, protein and flavor, Ezekiel satisfies my bread needs. However, it may not be for everyone. For more fluffy, pillowy sandwich breads, Ezekiel is probably not the best bet for you.

*Disclaimer* This is a personal blog and I do not receive monetary compensation for any of my product reviews. All reviews represent the opinion of Lucky taste buds based on personal use and results.

Ezekiel flax bread was provided for free for my review on LTB, but my opinion of the product is and will not be different based on whether or not it was provided free of charge.

Naughty Banana Chunky Peanut Butter Bread

What does a girl do to celebrate being done with her second year of dental school?? Why, BAKE of course!

As I sit here contemplating what I’ve suffered through achieved this year, I can’t help but feel relief, satisfaction, excitement, and most of all…pride, that I made it this far. I know it sounds cliche, but dental school is packed with challenges that I never knew existed. All I know is…I’m glad 2nd year is over. Never again!!!

National Boards were…horrendous. 3 weeks off to study for an 8 hour exam was bliss though. 😉 Not to mention I will never have to see biochemistry again. EVER!

Lab work is tedious. 10 hours to mount fake teeth for a set of dentures. 8 hours to bend wires for an ortho retainers. 6 hours to do one root canal….

Starting clinic and seeing patients is absolutely AMAZING. This is exactly why I quit my job in finance. Helping people with real problems and getting the chance to take away pain, to improve how someone eats, smiles, talks…it’s a wonderful feeling. Having a complete stranger put their faith and trust in you to take care of them is such a rewarding feeling.

Classes. Exams. Let’s just say I’m glad exams are finally over. Brutal 12-exam blocks no more! 😀

Looking for a twist to your good old banana bread? Want something with extra texture and packs a bolder flavor than the usual? Wanna indulge JUUUUST a teeny bit more than your usual? (Because I know I surely deserve it!)

You’ve found your recipe!

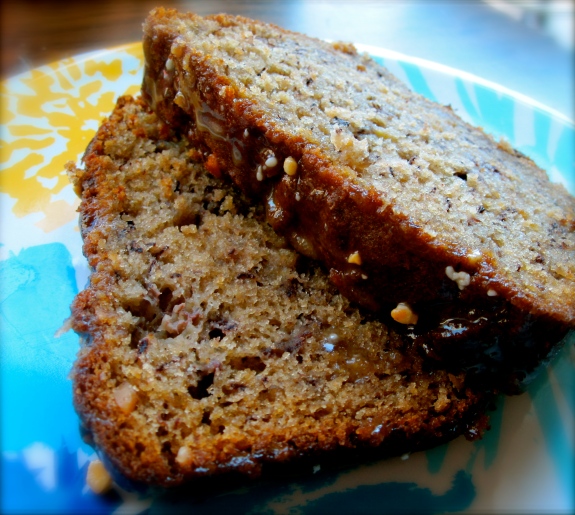
Banana Chunky Peanut Butter Bread

A dense, moist, sweet, yet light peanut buttery bread with a base of bananas, studded with crunchy peanut bits and glazed with a bright nutty peanut butter glaze.

A crowd pleaser for SURE (tried and tested). You won’t be able to stop at one bite and this is perfect to bring to parties. I promise! 🙂

Ingredients:

The Bread

  • 1/2 cup Butter, softened
  • 1/2 cup white sugar
  • 1/2 cup brown sugar
  • 1 tsp vanilla extract
  • 1/2 cup chunky peanut butter
  • 1.5 cups all-purpose flour
  • 1 tsp baking soda
  • 1 tsp baking powder
  • 1/2 tsp salt
  • 1/2 cup sour cream
  • 1/4 cup chopped peanuts
  • 1 cup ripe, spotty banana, mashed

The Chunky Peanut Butter Glaze

  • 1/3 cup powdered sugar
  • 1 tbs milk (I used almond milk)
  • 1 tbs chunky peanut butter

Directions:

  1. Preheat over to 350F. Grease a 9×5 inch loaf pan.
  2. In large bowl, cream together butter and sugar. Beat in eggs 1 at a time. Add vanilla and peanut butter. Mix well.
  3. Combine flour, baking soda, baking powder and salt mixture in medium bowl. Stir into butter-sugar mixture.
  4. Finally, fold in sour cream, peanuts and banana. DON’T OVER MIX!
  5. Bake in over for 60 minutes or until toothpick inserted into center of loaf comes out clean. Cool loaf in pan for 10 minutes before moving to wire rack to cool completely.
  6. After bread has completely cooled, make chunky PB glaze in a small bowl by combing all ingredients in a small bowl, mixing well. Drizzle over bread.
  7. DIVE RIGHT IN!!

Vanilla Coconut Key lime Pound Cake

Image

Part 1 of the National Dental Boards are over!!!

1/2 the way to being a dentist calls for a mini celebration…which comes in the form of summer, starting clinic, and FINALLY time for baking (and blogging)!!

There’s something so perfect about combining Coconut and Lime together. The bright beautiful colors and tropical flavors make this the perfect summer party cake.

Vanilla Coconut Key Lime Pound Cake

Image

Ingredients: (For Cake)

DRY

2 ¼ cups all-purpose white flour
1/2 teaspoon baking soda

WET

1 cup (2 sticks) unsalted butter (melted)

1.5 cups granulated white sugar or NuStevia Baking Blend (sugar-free option)
1 teaspoon vanilla
1 cup sour cream
3 large eggs

1/2 cup fresh squeezed lime juice
3 tbs grated and diced lime peel / rind

1/2 cup shredded sweetened coconut flakes (add more if you like coconut!)

Instructions:

1. Pre-heat oven toe 325F

2. Combine Dry ingredients in a medium bowl and mix well

3. Cream butter and sugar together, then add in remaining wet ingredients in order up to lime juice. mix well.

4. Mix in lime peel and shredded coconut

5. Pop into a pre-greased loaf tin and bake in over for 50 minutes or til a toothpick comes out clean from the deepest part of the loaf.

6. Cool cake before proceeding to glazing


ImageFor the 3-ingredient “Cheaters” Glaze

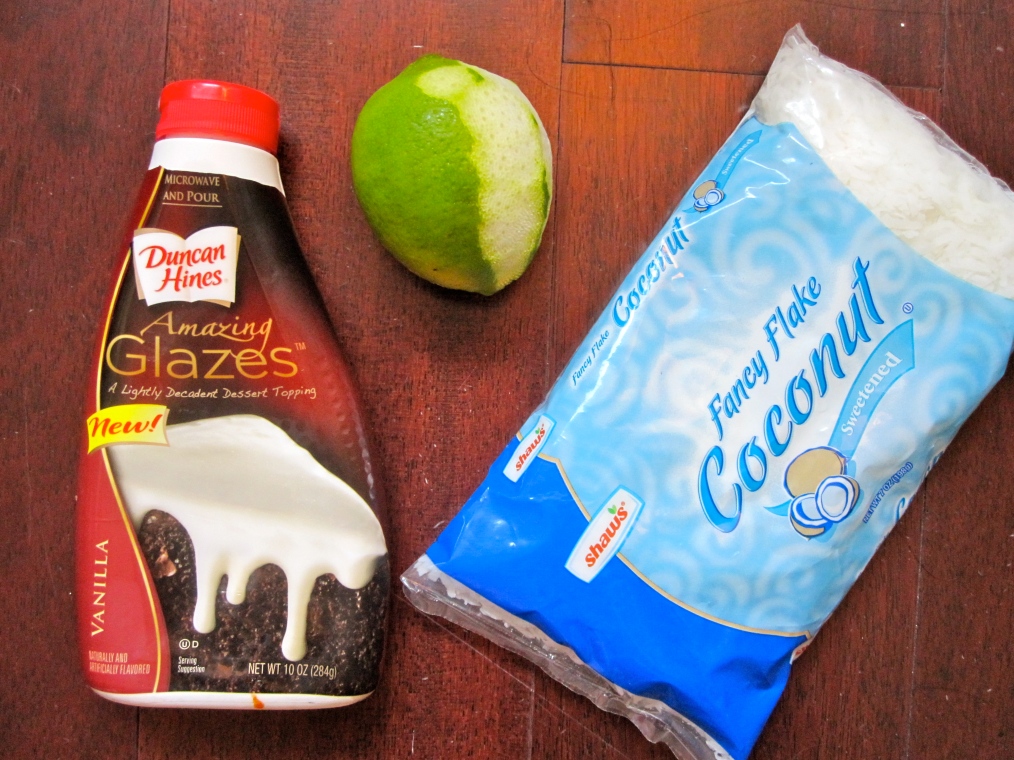
1 Bottle of Duncan Hines vanilla glaze (Follow instructions on bottle and drizzle over cake)

1 tbs lime rind diced into tiny pieces to sprinkle

handful of dried shredded coconut to sprinkle

Now, my favorite part…ImageEAT UP!! 😀


Vanilla Chai in Tervis

As a Foodbuzz Tastemaker, I was fortunate enough to receive a Tervis Tumbler to review just in time for exam block season a week ago!

This guy has proved himself to be EXTREMELY handy for studying/working at a desk with not a lot of space. Not only could I alternate hot and cold drinks in the same container, I absolutely LOVED that there were no condensation rings left on my table and study notes!

Even better, you can pick up the cup with your bare hands despite having a piping hot beverage inside.

You’ve probably seen these around already and think you know all about them, but here’s a little more somethin’ somethin’ extra.

  • Virtually indestructible – meaning, they won’t crack, melt, shatter or chip!!!
  • Comes with a lifetime guarantee
  • Have double-wall insulation so Hot drinks stay HOT and Cold drinks stay COLD!
  • No more condensation rings!!!!
Pumpkin Spice Vanilla Chai Tea 
Invented for the purpose of coffee-free caffeine with hints of Thanksgiving 🙂
  • 1 tea bag of vanilla chai tea, brewed in hot water
  • 1/2 cup of Almond milk (or any other milk)
  • Couple drops of Stevia to sweeten (or sugar)
  • Sprinkling of pumpkin pie spice over the top
Pretty self-explanatory recipe yah? Brew tea, dump in milk and stevia. Sprinkle spices. TA-DA!!!
Enjoy!  
For more information on Tervis Tumblers, check out their website.
(Notice the double insulation! 🙂 No coasters needed)

GlassDharma Giveaway: Glass Straws and their Health Benefits

Call me late to the party if you wish, but I’ve recently discovered GlassDharma straws after my MD diagnosed me with GERD and ordered smoothies to the diet plan.

Growing up, my dentist has always told me to consume sweet drinks (or even diet soda) through a straw to avoid cavities. After some research on my own, I came up with some tips to share. Some straw 101 if you want to call it that! (Source) Just remember that I’m no professional yet, but I do care a lot about cavities and I do my research!

  1. Positioning of the straw – when you use a straw, make sure to aim the opening to the back of your mouth so the sweet/acidic liquids contact as little “teeth” as possible! This will prevent staining AND cavities!
  2. Don’t swish your drink around your mouth unless it’s water! (Again, staining and cavities)
  3. The type of straw you use matters! Between Plastic, metal, and glass, guess which one creates the least waste? If you said metal and glass, you’d be correct. Now between these two, which one has the potential to cause LEAST teeth sensitivity from a hot/cold beverage? GLASS!!!

When I realized I would be drinking through a straw at least once a day, the shopoholic in me decided I needed to do some shopping/research to find the best straws out there.

I stumbled upon DharmaStraws on several blogs and read a ton of raving reviews on Amazon about them.

I concluded that I needed to test out these straws!

Enter DharmaStraws. A family business owned by a glassblower, David, and his wife who live in California.

David created a line of glass straws, to address the issue of abuse and misuse of plastic in our world today. Not only are they beautiful, but useful too. Other benefits include (from the website):

  • Glass straws don’t leach toxins into your food as you drink.
  • Each time you use your glass straw equals one less plastic straw ending up in your landfill.
  • One glass straw replaces thousands of plastic straws. (How many times will you use a straw the rest of your life?)
Furthermore,  the straws are…
  • Made of borosilicate tubing and is the strongest glass commercially available. (Means that we have spared no expense in bringing you the strongest, most durable drinking straw possible.)
  • Made of glass which does not leach ANY TOXINS into your food so you can use your non-toxic straws with confidence.
  • Great for hot or cold drinks, microwave and dishwasher safe!
  • Covered with a Lifetime Guarantee Against Breakage – Meaning that if they ever break, GlassDharma will replace them – Free! (how many companies still do this??)
  • Hand-made in the U.S.A.
Upon receiving the straws, I took ’em out for a test drive.
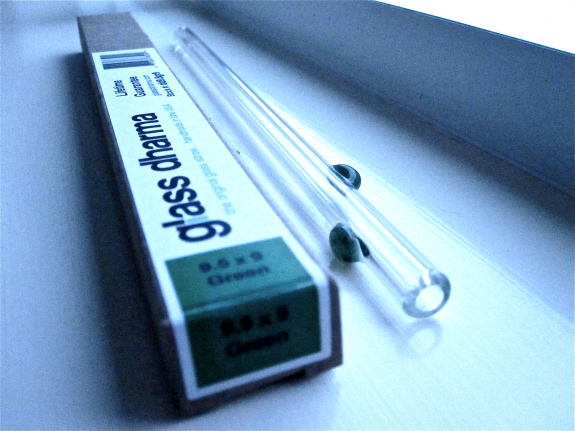
The green 9.5mm with a little bend near the end is PERFECT for water. Ice cold, warm, and even hot (though I don’t dare drink hot water through glass). *FACT* You drink more when you drink through a straw. You can fact check me on that, but I really did drink more water. And feel like a lady while doing so too!
The purple  12mm straight straw can be purchased with a little cleaner added to the straw box. The thicker width suggest that YEESS indeed this is the ULTIMATE smoothie straw. My biggest problem with drinking through this straw is BRAIN FREEZE. Gotta learn how to hold my horses.;)
This is your perfect entertaining straw. Sipping pink lemonade through this will surely upgrade any party and I’m sure guests will be fighting over it. It’s also beautiful to look at and sits out on the kitchen counter like it was meant to be there.
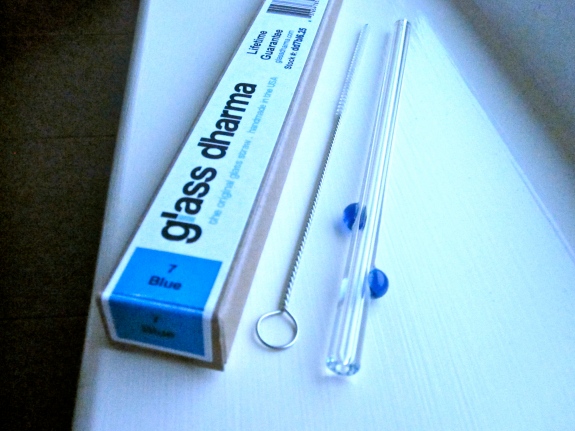
The blue 7mm was a stunner the moment I opened it. This, is probably my favorite. Yes, it’s true the water comes through there a little slower than the 9mm straws, but just looking at it brightens up my day! The straw can be purchased with a little cleaner added to the straw box, cause you’ll probably need it at some point! You can kind of tell from the picture that this is a real delicate-looking (my kind of classy) straw.
XXX
One lucky reader will receive a $25 gift certificate to GlassDharma to use on any product you desire! To win, simply leave a comment below about something you’ve learned from this post. For a bonus entry, tweet/link back directly to this post and leave a comment saying you did so!
Giveaway ends on: October 22nd at 10pm EST. A random winner will be picked!  Good Luck!
XXX
NOTE: Giveaway has ended.
Winner selected: Laury at Thefitnessdish.com

How to protect your teeth


There are a million things you eat that contribute to cavities.

Doesn’t matter what you eat, no matter how healthy your diet is, there will be 2 things in it: sugars and acid.

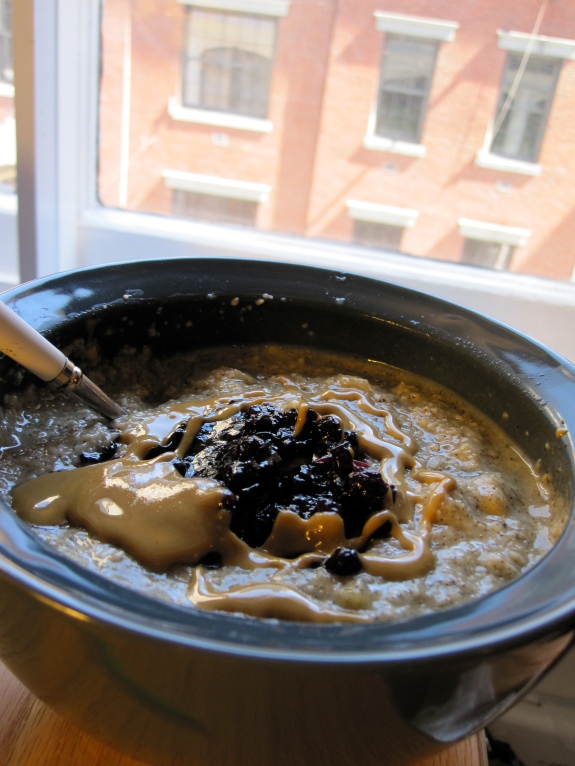
Your morning oats for example. The sugar in the jam and nut butter, the breakdown of starch from the oats into simple sugars.

Probably don’t have to mention where the sugar from this comes from, right?

The point is, sugars are an important staple in our diet. Don’t avoid it at all costs, but don’t gorge either!

But there are ways to keep your teeth healthy and happy despite a diet high in sugars. Here are some tips I can offer you. Remember, I’m a dental student and not yet certified, but we spend many hours in class mulling over these issues…

As well as creating “wax ups” of teeth. Check it out. We melt green wax over a plaster model with a tooth sanded off. Then using hand tools, we sculp every single nook, ridge, and cranny back on the model. When we’re done, you have to check for TEN contact points in specific locations using the upper jaw to make sure the tooth is “functional” inside this jaw.

You’re lookin’ at 50 hours right here.

Tip #1: Eat your dessert RIGHT after your main meal. Don’t wait for 2 hours later before you dig in to the fruit or ice-cream.

Why? After a meal, your oral cavity will stimulate salivation to bring the pH up to a level where your teeth can re-mineralize (aka get stronger!). Constantly snacking keeps pH in your mouth low so that your teeth cannot remineralize and more prone to cavities. If you can’t avoid snacking, brush afterwards or chew some gum, which will help restore the pH in your mouth to more alkalinic levels.

Tip #2: ALWAYS floss at night before you sleep. You can even skip the mouthwash as long as you floss.

Why? I can’t tell you how easy it is for food to get stuck in those crevices overnight and for bacteria to get to work, nibbling away at your teeth as you sleep.

Tip #3: Say “NO!” to soda

Why? Unless the soda is completely real/fake sugar free, don’t drink it. Obviously, regular soda has sugar that stays on your teeth for as long as you sip it, BUT diet soda still has acids in it that wear down your enamel. Just google it. Straws MAY make it better. A tad.

Tip #4: Limit hard candy & Candy that sticks to your teeth!

Why? Suckers are a huuuuge cavity problem. The issue is not how MUCH sugar you eat, it is how LONG that stuff stays on your teeth.

Do you have any helpful tips to share with us? Please leave a comment below! 🙂


3 Anti-Cavity Foods You Never Knew About!

Hi friends!

Lucky Taste Buds has been going through some rough patches and disappearances lately, but I hope that you’ll keep me on your Google Reader or visit occasionally because sometimes, I WILL share something useful!

Dental school has kept me busy, but if I’ve been learning all this “good stuff”, I figured all you food-lovers and health-lovers would also appreciate some good oral health care tips too!

Three fabulous foods you never knew could prevent cavities! 

1. CHEESE

Yup, protein and fat. The combination (free of sugar) is actually anti-cariogenic! (which means, anti-cavities!) Another fabulous reason to eat cheese I guess.

2. XYLITOL

Whether it is xylitol gum or xylitol mints, these are great to pop in your mouth after a meal if you can’t brush. Personally, I do both, but I find that chewing gum encourages my teeth grinding habit, so sometimes I go with mints during more stressful periods (exam time) when I know I tend to grind more!

Spry makes delicious mints in many flavors, including peppermint, lemon, and berryblast! Trident also makes gum with xylitol in it now!

3. CACAO

Nope, not the chocolate that is full of sugar and milk, but the real stuff. Dark, wholesome goodness.

Now I can not-so-stealthily transition into some amazing raw, organic dark chocolate that I got to sample recently from Fearless Chocolate.  Look how cute the bars are!!! 🙂

Fearless Chocolate makes 5 dark chocolate flavors, all raw, all organic, and all dairy-free!!

All the bars are 2 servings and 120 calories per serving.

  • 75% Cacao Dark as midnight Great for those who love dark chocolate straight up. This was one of my favorites!
  • 70% Cacao Matcha Green Tea Peppermynt Though not as green tea heavy as I would like it to be, still a refreshing, unique flavor that I enjoyed.
  • 70% Cacao Super Seeds (with Chia AND hemp seeds!) I know, I know, seeds are good for ya, but this flavor took me a while to warm up to. It had a nice crunchy texture but the seeds kept getting stuck in my teeth! 
  • 70% Cacao Sweet and Hot (with Hibiscus and Ginger) I can’t say anything good about this flavor so I’m gonna keep my mouth shut. I honestly didn’t enjoy this one much. 
  • 70% Cacao Exploding Coconuts This was my #1 favorite. I am NOT a coconut lover, but the shredded coconut in here just works wonders. 

And because I know everyone is interested in some stats and ingredients. Here is my favorite flavor and its nutrition label. The other flavors don’t deviate much from this awesome, short, wholesome ingredient list!

Thank you Fearless Chocolate for providing the samples. Rest assured that all opinions above are my own and I was not subsidized or compensated in any way for this review.

7 Things You Never Knew about Dental Schools

Two weeks into classes at dental school and already, I have never felt like I worked so hard yet had THIS much fun learning as I do now! Here are 5 things that even I didn’t know about dental schools and dentistry before school started!

Check out our simulation lab. 😛

7. Dental school folks know how to work hard (really hard)…and play hard too!

6. Dental students dissect cadavers from the pelvis and UP! That means, we have to memorize every single nerve, muscle, artery, vein, membrane, fascia and its function. (which also means, I’m in anatomy lab ~15+ hours/week…that’s how well we have to know our bodies!)

5. Dental school is 4 years and we need to pass the national boards (after 2nd year and after 4th year) to be able to graduate, just like in medical school.

4.If you want to specialize (i.e. orthodontics, pediatrics, oral surgery), there is an additional 2-6 years MORE schooling you have to go through to be licensed! (You also have to be like…top 5% of your class to be able to get into one of those programs!)

3. Dental students practice giving EACH OTHER injections (mostly during their 2nd year of school) before they ever inject a patient.

2. Dental school is just as competitive to get into as medical school! (Tufts accepted under 4% of their applicants to their dental class this year.)

1. If you’re like me, after dissecting a human body, you have NO desire whatsoever to eat anything that has blood or animal fat. The current dental school diet for me consists of: Plenty of bars, PB & jelly banana sandwiches, and take-out.

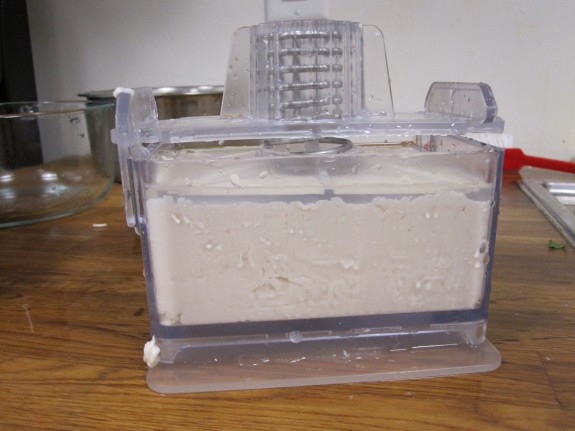
As for protein, please meet my newest friend (courtesy of Tofu Xpress):

This would be my new Tofu Xpress tofu press, containing SILKEN tofu! Yes, silken! I was shocked to find that not only did this contraption get all the liquid out of my soft, silky tofu block, it didn’t crush it to pieces! I was able to take out the whole block of tofu in one block. The only complaint is that it takes some womanly muscles to push that springy lid all the way down to lock under the plastic wings.

Alright guys…back to studying. Such is life. 🙂

Welcome to Boston!

It’s been a few months since I last updated. I know I’ve been MIA with the comments but I’ve been following you all – yup, even through the HLS, which I unfortunately missed due to travels and moving.

My very lucky taste buds have been eating their way through Hong Kong, Cancun, LA, Malibu…and now, BOSTON!! I’ll be reporting to you live, the life and gripes and food from the perspective of a poor dental student, but hopefully it’ll be fascinating too! If you ever wanted to know how dentists were educated or what dentists eat…maybe LTB will shed some light on that. 😛

Garlic “Tong Choi” from Fuk Lum Moon, HK dimsum restaurant.

Grilled MahiMahi with Coleslaw and Rice Pilaf from Malibu Seafood.

Cha Cha Chicken from Cha Cha Chicken at Santa Monica Pier.

While I settle in, I’d love if any of you familiar with Boston’s dining scene to drop a comment or 2 below! I welcome all recommendations! And if you’re not familiar with Beantown, tell me what you’ve been up to!!!! Don’t give up on me yet. 🙂

On a side note, CSN has a lot of options for twin beds for me to furnish this little home of mine at a good price!

Manna Bread Uncensored

Oh Manna. This ain’t your ordinary bread. I like to think of Manna Bread as the healthiest, most wholesome, nutty delicious flour-less vegan cake-like organic bread you can possible devour. Except it’s not cake. This is 100% “bread” because Manna breads have no grease, no sweeteners, no eggs, and no salt.

Intrigued?
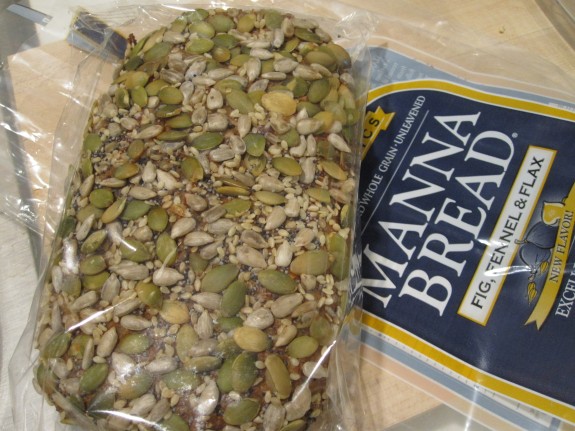
What is Manna bread? It is a line of 100% sprouted high-protein whole-grain bread (so moist and dense it’s like cake, the way I see it.)

Manna bread does NOT contain: No salt, yeast, oils, sweeteners, leaving agents, anything artificial!

Manna Bread comes in 9 flavors: Banana Walnut Hemp, Carrot Raisin, Cinnamon Date, Fig Fennel Flax, Fruit & Nut, Millet Rice, Multigrain, Sunseed, and Whole Rye.

Manna Sourdough bread comes in 3 flavors: Multi-grain Flax sourdough, Bavarian Rye sourdough, Sunny sourdough

The Pros: The breads really are delicious (read: addicting), filling, high in protein, high in fiber, all-natural, nutrient dense, nutty, in short, WORTH every penny!!

The (Only) Cons: These loaves come smaller than your average loaf of bread and are NOT pre-sliced. I have difficulty stopping at a single piece or two because they taste so good!! For those a little afraid of portion control, make sure you slice it or weight it or stash it away once you’re satisfied!

The Sourdoughs…

Multi-grain Flax Sourdough

Stats (per slice/50g): 130 cals, 2.5g fat, 200mg sod, 24g Carbs, 6g Fiber, 5g Protein

Ingredients: Filtered water, organic whole wheat flour, organic rye flour, organic multigrain blend (organic whole wheat, organic rye, organic barley, organic oats, organic flax, organic millet, organic buckwheat), organic flaxseeds, sea salt.

Tastiness: 7.5/10. This exceeded my expectations for both a sourdough bread and a multi-grain bread. Obviously, the stats are great, but after toasting, this bread gave off a lovely nutty yet sour doughy smell that

Bavarian Whole Rye Sourdough

Stats (per slice/50g): 120 cals, 1g fat, 220mg sod, 25g Carbs, 8g Fiber, 5g Protein

Ingredients: Organic rye flour, filtered water, sea salt, organic caraway seeds, organic fennel seeds, organic coriander seeds.

Tastiness: 9/10. This was one of the best savory, smooth, hearty sourdough breads I’d ever tasted. The flavor was not too tart like sourdough bread can be with a deep rye aroma. Wonderful when topped with hummus!

The Non-Sourdoughs…
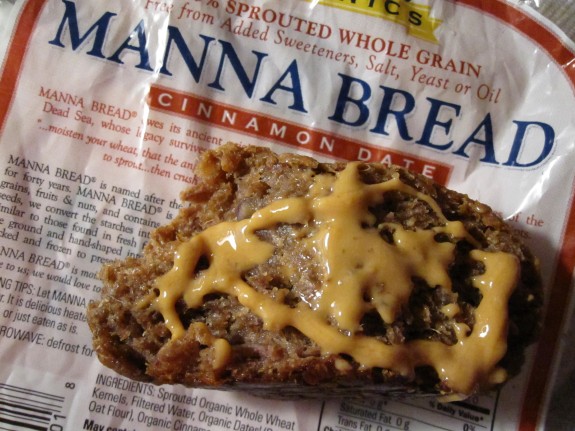
Cinnamon Date

Stats (per 2oz slice/56g): 150 Cals, 0g fat, 15mg sodium, 29g carbs, 5g fiber, 6g sugar, 8g protein

Ingredients: Sprouted organic wheat kernels, filtered water, organic dates, organic cinnamon, organic oatmeal

Tastiness: 9/10. This is everything I wanted in a nutty, sweet bread that is high on chew and doughy factor. It is definitely not as cinnamon-y or date-filled as I would like, but paired with some pumpkin butter and your own sprinkling of dried fruit, this is wonderful dessert bread. Perfect for an after dinner treat!

Banana Walnut Hemp Manna Bread

Stats (per 2oz slice/56g): 140 Cals, 4.5g fat, 5mg sodium, 27g carbs, 2g fiber, 12g sugar, 5g protein

Ingredients: Sprouted organic wheat kernels, filtered water, organic dried banana, organic walnuts, organic flax seeds, organic hemp seeds

Tastiness: 6/10. This bread fell short of my expectations because it wasn’t half as banana-flavored as I’d like. However, the bread was still tasty and studded with lots of walnut pieces. This flavor isn’t as succulent and sweet as several other flavors, such as the fruit and nut or the cinnamon date. If you’re craving some real banana flavor, try topping the loaf with some fresh banana slices!

Fig Fennel Flax

Stats (per 2oz slice/56g): 120 Cals, 1.5g fat, 10mg sodium, 26g carbs, 5g fiber, 8g sugar, 4g protein

Ingredients: Sprouted organic wheat kernels, filtered water, organic black mission figs (diced figs, organic out flour), organic flax seeds, organic fennel seeds, organic poppy seeds, organic pumpkin seeds, organic sunflower seeds, organic sesame seeds

Tastiness: 7/10. A textural PARTY in my mouth! Ultra moist, dense, and absolutely loaded with crunchy pumpkin and sunflower seeds over the top while the inside is studded with crunchy flax seeds. Initially, it doesn’t seem as sweet as the name promises and I didn’t feel the fig represented in the loaf, but the next couple bites sealed the sweet deal. However, I’m not a fan of the fennel in sweet bread so the heavy fennel flavor was a no-go for me.

Fruit and Nut

Stats (per 2oz slice/56g): 140 Cals, 1g fat, 7mg sodium, 27g carbs, 6g fiber, 16g sugar, 6g protein

Ingredients: Sprouted organic wheat kernels, filtered water, organic raisins, organic dates, organic almonds, organic cashews, organic hazelnuts, organic cinnamon, organic nutmeg, organic oatmeal

Tastiness: 8/10. This loaf has the most sugar nutritionally out of all Manna bread flavors, mainly coming from the organic raisins and dates. However, being someone with a sweet tooth, this bread was perfect as a dessert, sweet snack, or breakfast. PERFECT when topped with peanut butter!

Millet Rice

Stats (per 2oz slice/56g): 130 Cals, 0g fat, 10mg sodium, 28g carbs, 5g fiber, 9g sugar, 5g protein

Ingredients: Sprouted organic wheat kernels, filtered water, organic millet, organic brown rice

Tastiness: 8/10. Flavor-wise, this had a hint of sweetness, was nutty and mild. The versatile bread could use a topping or two in order to play up either its sweet or savory characteristics, but it is also delicious on its own. Texturally, the millet rice provided a ton of crunch to it, almost to the point where I felt like the millets were designed to get stuck in between my teeth.

Other Manna Bread FAQ’s (in case you were wondering)…

1. You can buy Manna breads in the frozen section at Whole Foods, or online. Here is Manna’s product catalog.  http://www.mannaorganicbakery.com/ver.php?mod=categories_product_catalog

2. How long can Manna Bread keep for?

Frozen (-10 F) – up to 1 year

Refrigerated (35 F) – 2-3 weeks

Room Temp (65 F) – up to 5 days

3. Why is the bread so sweet if Manna doesn’t use sweeteners?

The sweetness of Manna Bread® is solely due to their unique sprouting process, which converts starches into maltose and other complex carbohydrates. There is no added sugar, no yeast, no salt, or preservatives.

For all other questions, please visit Manna Organics for information! 🙂
Ultra-Swirly Cinnamony Cinnamon Rolls

I have always been afraid of live yeast.

I was a science major in college and even with 4 years of bio labs under my belt, yeast cultures on petri dishes still gave me goosebumps. When Nick suggested we bake cinnamon rolls from scratch this weekend, the first thing that popped into my mind was, OH CRAP, YEAST.

Except, who knew that it was going to be so easy and that it would be so much fun to make your own cinnamon rolls at home??

IMG_0185

Here is my issue with buying cinnamon rolls from “others”. Yes, including the purchase of you, mister P. Doughboy rolls:

1. They are always TOO freakin’ big! Who needs 6 rolls the size of your head when you can have 12 the size of your fist you can eat and share with your doorman, or neighbors, or friends?

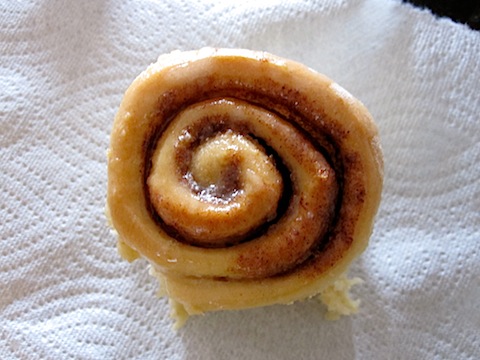
2. There are NEVER enough swirls!!! I am a cinnamon sugar girl, and if you don’t make your own rolls, the rolls will have 2 swirls at the most! Meaning, it is full of unflavored dough and not enough cinnamon.

3. They are always too sweet. There is always too much icing.

4. Laying out rounds of Pillsbury doughbough can never instill as much pride in you as overcoming your fear of living yeast, rolling your own dough, and baking cinnamon rolls you can call YOUR own.

5. Did someone say, TOO MUCH BUTTER?

To avoid all this, I suppose the best thing to do would be to bake your own rolls. and you know what? It is SO worth it.

IMG_0182

THE ULTRA-Cinnamony CINNAMON ROLLS (The lower-fat and sugar kind)

This was originally Paula Deans recipe. I took out some butter and sugar, stretched the dough thinner, added more cinnamon, and made more swirls. The result? 20 cinnamons rolls vs. 12 and a TON more flavor! As usual, feel free to substitute ingredients.

Ingredients

Dough:

  • 1/4 ounce package yeast
  • 1/2 cup warm water
  • 1/2 cup scalded vanilla soy milk
  • 1/4 cup granulated sugar (I used NuNaturals baking blend for a sugar-free dough)
  • 1/3 cup butter
  • 1 teaspoon salt
  • 1 egg
  • 3 1/2 cup all-purpose flour (you can use whole wheat flour)

Filling:

  • 1/4 cup melted butter
  • 3/4 cup light brown sugar
  • 3 tablespoons ground cinnamon (I used 4!)
  • Oil spray to grease baking pan
  • granulated white sugar to dust over pan (optional, but totally delicious)

Glaze:

  • 2 tablespoons butter, melted
  • 1 cup powdered sugar
  • 1 teaspoon vanilla extract
  • 3 tablespoons hot water  

Directions

1. Dough: In a small bowl, dissolve yeast in warm water and set aside. In a large bowl mix soy milk, sugar, melted butter, salt and egg. Add 2 cups of flour and mix until smooth. Add yeast mixture. Mix in remaining flour until dough is easy to handle. Knead dough on lightly floured surface for 5 to 10 minutes. Place in well-greased bowl, cover and let rise until doubled in size, usually 1 to 1 1/2 hours.

IMG_0156

2. When doubled in size, punch down dough. Roll out on a floured surface into a 15 by 11-inch rectangle. Spread melted butter all over dough. Mix sugar and cinnamon and sprinkle over buttered dough. Beginning at the 15-inch side, role up dough and pinch edge together to seal.

IMG_0158

Cut into 18-20 slices. (Nick cut half a tube, I cut the other half)

IMG_0167

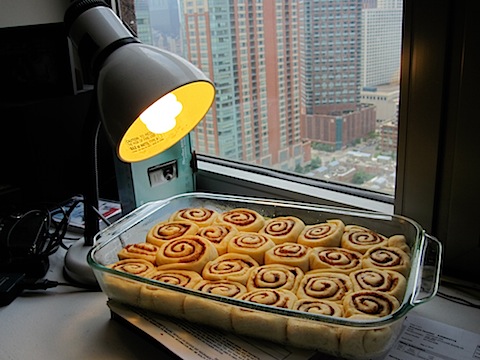
3. Heat oven to 350 degrees F. Coat the bottom of baking pan with cooking spray and sprinkle with granulated sugar. Place cinnamon roll slices close together in the pan and let rise until dough is doubled, about 45 minutes. (I’m not sure if the lamp/heat helped, but it did make for an entertaining sight!)

Allow rolls to double in size

Bake in oven for about 35 minutes or until nicely browned.

4. Icing: Meanwhile, mix butter, powdered sugar, and vanilla. Add hot water 1 tablespoon at a time until the glaze reaches desired consistency. Spread over slightly cooled rolls. If you’re desiring a taste before icing, go ahead!

IMG_0181

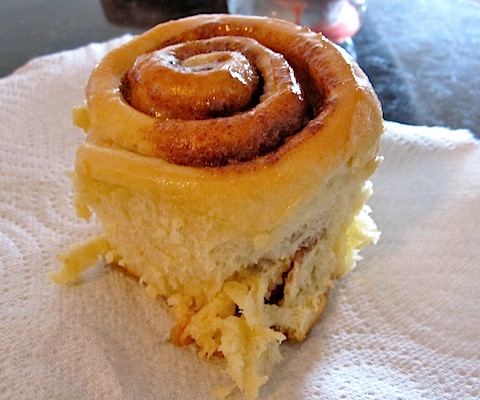
5. Do not allow to fully cool before devouring. Pick your favorite pieces or the biggest roll there is…and eat!! 🙂

  IMG_0187

IMG_0184

A note to my favorite readers: I’ll be vacationing in Hong Kong for 2 months before I return to the US and move to Boston for grad school in August! I hope you all follow me and my foodie adventures to Asia and soon enough, Boston!! I am SO excited.

And just for you, I’ve calculated the nutritional stats at Caloriecount.com. These stats are for one Ultra-swirly cinnamony cinnamon roll.

Nutrition Facts
Serving Size 50 g
Amount Per Serving
Calories

188

Calories from Fat

64

% Daily Value*

Total Fat

7.1g

11%

Saturated Fat

4.2g

21%

Trans Fat

0.0g

Cholesterol

27mg

9%

Sodium

171mg

7%

Total Carbohydrates

28.4g

9%

Dietary Fiber

0.6g

3%

Sugars

11.5g

Protein

2.8g

Vitamin A 4% Vitamin C 0%
Calcium 1% Iron 6%
Nutrition Grade C

* Based on a 2000 calorie diet